Pages

Thursday, July 3, 2014

Chicken Verde Enchiladas

THE RECIPE

Courtesy of: Cooking Light Magazine - May 2014 Issue

3/4 cup prechopped onion
3/4 cup unsalted chicken stock
1/2 cup salsa verde
1/3 cup finely chopped cilantro stems
2 tbsp sliced pickled jalapeno pepper
5 tsp all-purpose flour
1/2 tsp ground cumin
2 garlic cloves, thinly sliced
8 oz shredded skinless boneless rotisserie chicken breast (about 2 cups)
3/4 cup chopped tomato
3 tbsp reduced-fat sour cream
1 ripe peeled avocado, coarsely mashed
8 (6-inch) corn tortillas
4 ox reduced-fat sharp cheddar cheese, shaved
2 tbsp cilantro leaves

Place oven rack in lower third of oven, and preheat broiler to high.

Combine first 8 ingredients in a medium saucepan, stirring with a whisk. Bringing to a boil; reduce heat, and simmer 4 minutes. Stir in chicken; cook 1 minute or until heated. Remove from heat. Stir in tomato, sour cream, and avocado.

Stack tortillas; wrap stack in damp paper towels, and microwave on HIGH for 45 seconds. Spoon 1 cup chicken mixture into 11 x 7-inch glass or ceramic banking dish. 


Spoon 1/3 cup chicken mixture in a center of each tortilla; roll up. Arrange tortillas, seam sides down, in baking dish. 


Top with cheese. Broil 3 minutes or until cheese melts. Sprinkle with cilantro leaves.


TIPS & TWEAKS

This recipe called for pickled jalapeno peppers, but we bought fresh and chopped it up. We also did not use rotisserie chicken, we cooked chicken breasts in the oven at 350 degrees for 30 minutes, then shredded it.

Also, we wanted a more baked taste, so we baked the dish at 350 degrees for about 20-25 minutes, broiling for the last 3 minutes.

REVIEW

It might be obvious how amazing this recipe is in the fact that we didn't get a picture of this after it was baked! Yes, this is amazing and we will be making it quite often.

Fried Shrimp Rolls

THE RECIPE

Courtesy of: Food Network Magazine - July/August 2014 Issue

1 lb extra-large shrimp (16 to 20 count), peeled and deveined
3 large eggs
1-1/2 cups milk
1 tsp paprika
Kosher salt
1-1/2 cups all-purpose flour
Freshly ground pepper
1-1/2 cups breadcrumbs (preferably fresh)
3/4 cup mayonnaise
1/4 cup chopped dill pickle
2 tbsp ketchup
1 tbsp horseradish, drained and rinsed
1 tsp Worcestershire sauce
4 scallions, finely chopped
1 tbsp minced fresh parsley
Peanut or vegetable oil, for frying
4 Portuguese or kaiser rolls, split open
Shredded iceburg lettuce, for topping
Lemon wedges, for serving

Butterfly the shrimp by slicing along the backs and cutting about halfway into the flesh. Whisk the eggs, milk, paprika, and 1 tsp salt in a shallow bowl; add the shrimp and refrigerate at least 15 minutes and up to 1 hour.


Put the flour in a shallow bowl and season with pepper. Put the breadcrumbs in another shallow bowl. Remove the shrimp from the egg mixture, dredge in the seasoned flour. Dip the shrimp in the egg mixture again, then roll in breadcrumbs to coat; transfer to a rack set over a baking sheet and refrigerate until ready to fry.

Meanwhile, combine the mayonnaise, pickle, ketchup, horseradish, Worcestershire sauce, scallions, and parsley in a small bowl. Cover and refrigerate until ready to serve.


Heat about 1/2 inch peanut oil in a large skillet over medium-high heat until a deep-fry thermometer registers 350 degrees. Working in batches, add the shrimp and fry, flipping halfway through, until golden brown, about 5 minutes. Remove the shrimp with a slotted spoon and drain on paper towels; season with salt.


Spread the mayonnaise mixture on the rolls and fill with shredded lettuce and the fried shrimp. Serve with lemon wedges.


REVIEW

You must make this amazing sandwich this summer! A few things we did differently were not adding horseradish (we just don't prefer it) and used bread and butter pickles instead of dill. Even the recipe for just the fried shrimp is pretty amazing and can be used as a summer favorite!


Caesar Chicken with Orzo

THE RECIPE

Courtesy of: Betty Crocker's Best Chicken Cookbook

1tbsp vegetable oil
4 boneless, skinless chicken breast halves (about 1-1/4 lbs)
1 can (14.5 oz) ready-to-serve chicken broth
1 cup water
1 cup uncooked rosamarina (orzo) pasta
1 bag (16 oz) frozen brocoli, green beans, pearl onions, and red peppers
3 tbsp Caesar dressing
1/8 tsp coarsly ground pepper

Heat oil in 10-inch skillet over medium-high heat. Cook chicken in oil, about 10 minutes, turning once, until brown. Remove chicken from skillet and keep warm.

Add broth and water to skillet, heat to boiling. Stir in pasta; heat to boiling. Cook uncovered 8 to 10 minutes, sitrring occasionally, until pasta is tender. Stir in frozen vegetables (cut any large broccoli pieces in half) and dressing. Add chicken. Spring with pepper.

Heat to boiling; reduce heat. Simmer uncovered about 5 minutes or until vegetables are crisp-tender and juice of chicken is no longer pink when centers of thickest pieces are cut.

REVIEW

The Caesar dressing in this recipe really adds a lot of flavor to the dish! We were not able to find the frozen vegetables the recipe called for, so we used a green/yellow bean medley that included carrots, and put fresh chopped onion in with the vegetables.  Overall, this is a pretty easy and tasty recipe.


Grilled Texas Turkey Burgers

THE RECIPE

Courtesy of: Betty Crocker's Best Chicken Cookbook

1 lb ground turkey
1/3 cup barbecue sauce
1 can (4 oz) chopped green chilies, drained
4 slices (1 oz each) Monterey Jack cheese with jalapeno peppers
4 hamburger buns split

Brush grill rack with vegetable oil. Heat coals or gas grill for direct heat. Mix turkey, barbecue sauce, and chilies.

Shape mixture into 4 patties, each about 3/4 inch thick. Cover and grill patties 4 to 6 inches from medium heat, 14 to 16 minutes, turning once, until no longer pink in center.  About 1 minute before burgers are done, top each with cheese slice. Grill until cheese is melted. Server on buns.


REVIEW

This is an extremely easy and tasty burger to make, not to mention it's pretty healthy using turkey! The barbecue and chilies give it a little heat but keep the turkey moist. We added some fresh avocados on top to add to the creaminess of the burger. We loved this burger so much we made it again a week later!


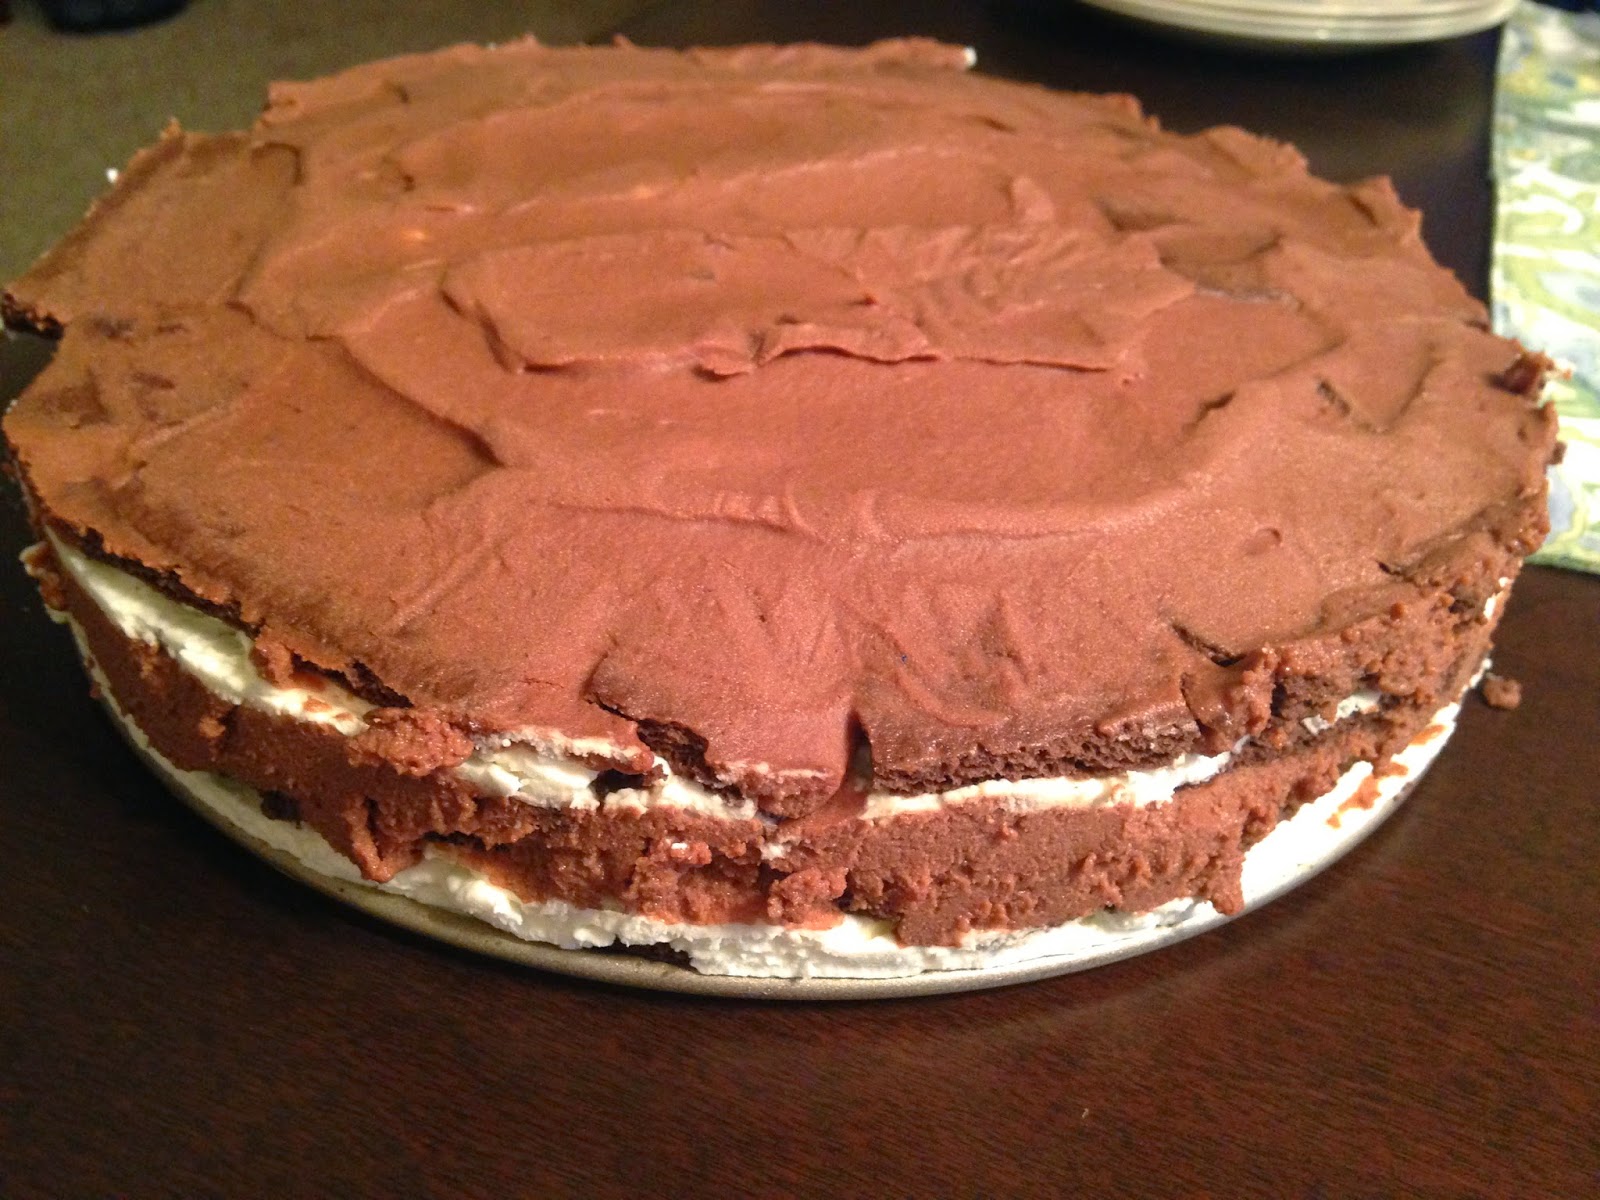
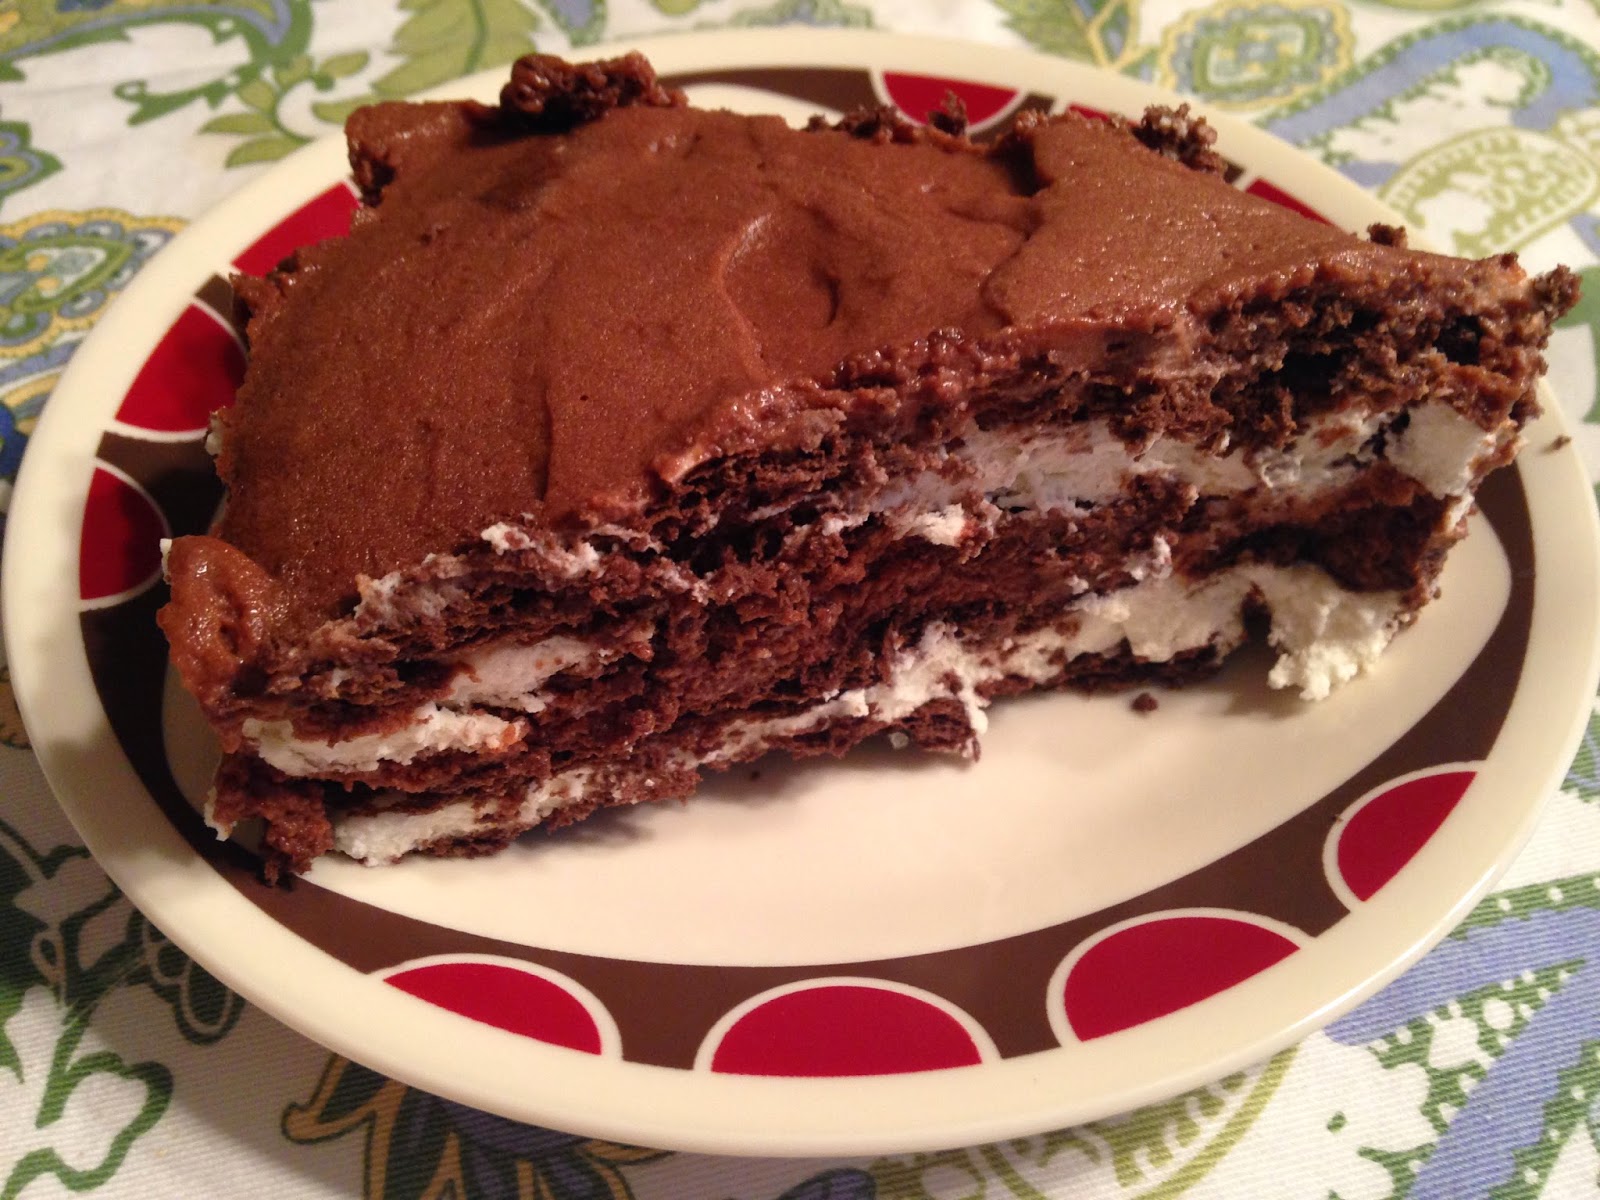
Chocolate-Hazelnut Icebox Cake

THE RECIPE

Courtesy of: Food Network Magazine - July/August 2014 Issue

1-3/4 cup cold heavy cream
1-1/2 cup mascarpone cheese
1/3 cup confectioners' sugar
1 tsp vanilla extract
2/3 cup chocolate-hazelnut spread (such as Nutella)
20 whole chocolate graham crackers

Beat 1 cup heavy cream, 3/4 cup mascarpone, the confectioners' sugar, and vanilla in a bowl with a mixer on low speed, until combined. Increase the speed to medium and beat until stiff peaks form, 1 to 2 minutes.

Combine the remaining 3/4 cup each of heavy cream and mascarpone with the chocolate-hazelnut spread in a separate bowl.  Beat with the mixer on low speed until combined, then increase the speed to medium and beat until stiff peaks form, 1 to 2 minutes.

Line the bottom of an 8-inch springform pan with 4 graham crackers in a single layer, breaking them into pieces to fit and fill any big gaps.  spread half of the vanilla whipped cream over the graham crackers, then top with another layer of graham crackers.  Spread half of the chocolate-hazelnut whipped cream on top. Repeat with another layer of graham crackers, the remaining vanilla whipped cream, then more graham crackers, and the remaining chocolate-hazelnut whipped cream.  Cover the pan with plastic wrap and refrigerate at least 6 hours or overnight.


Uncover the cake and run a thin knife around the edge to loosen.  Remove the springform ring; smooth the sides of the cake using an offset spatula.  Put the remaining 4 graham crackers in a large resealable bag; crush into fine crumbs using the bottom of a skillet.  Press crumbs around the side of the cake.


REVIEW

Yea... so this cake is soooooo amazing, we didn't even waste the time putting the crumb topping around the edge of the cake! This is the easiest and most delicious thing we've made in a long time. And you better believe we'll be making it again very soon!


Sunday, April 27, 2014

Chicken and Root Vegetable Soup

The Recipe

Courtesy of: Betty Crocker's Best Chicken Cookbook

2 tbsp butter
1 small onion, finely chopped (1/4 cup)
3 medium carrots, thinly sliced (1 cup)
3 medium parsnips, peeled and sliced (1 cup)
1 medium leek, sliced (2 cups)
7 cups chicken broth
1 cup uncooked orzo pasta
2 cupts shredded cooked chicken breast
2 tbsp chopped fresh or 2 tsp dried dill weed
1/2 tsp salt

Melt butter in Dutch oven over medium heat. Cook onion, carrots, parsnips, and leek in butter, stirring occasionally, until carrots are tender. 

Stir in broth and pasta. Heat to boiling; reduce heat to love. Cover and simmer about 15 minutes, stirring occasionally, until pasta is tender.

Stir in remaining ingredients. Cover and simmer about 5 minutes or until hot.


Review

This is a quick and easy soup recipe that is delicious! All of the root vegetables give it a very hearty flavor. We highly recommend this soup!


Chicken and Tortellini Salad

The Recipe

Courtesy of: Betty Crocker's Best Chicken Cookbook

1 package (9 oz) refrigerated cheese-filled tortellini
6 cups bite-size pieces assorted salad greens
3 cups chopped cooked chicken
1/2 cup Italian dressing
1/3 cup shredded Parmesan cheese

Cook and drain the tortellini as directed on the package. Mix tortellini and remaining ingredients, except cheese. Sprinkle with cheese.

Review

Yes, it is that simple! And that's why we make this salad for dinner a lot. You can cook the chicken ahead of time on the weekend (bake in the oven at 350 degrees for 30 minutes - this is for 2 skinless, boneless chicken breast) and just toss everything together on a busy night! It's an incredibly tasty, and healthy, meal!


By the way - we highly recommend this cookbook. We have tried nearly every recipe in this book!

Lemon Meringue Pie

The Recipe

Courtesy of: allrecipes.com

1 cup white sugar
2 tbsp all-purpose flour
2 tbsp cornstarch
1/4 tsp salt
1.5 cups water
2 lemons, juiced and zested
2 tbsp butter
4 egg yolks, beaten
1 pie crust, baked (see the Cherry Pie recipe posted August 15, 2013 for a pie crust recipe)
4 egg whites
6 tbsp white sugar

Preheat oven to 350 degrees. 

To make lemon filling, whisk together 1 cup sugar, flour, corn starch, and salt in a medium saucepan.  Stir in water, lemon juice, and lemon zest. Cook over medium-high heat, stirring frequently, until mixture comes to a boil.


Stir in butter. Place egg yolks in a small bowl and gradually whisk in 1/2 cup of hot sugar mixture. Whisk egg yolk mixture back into remaining sugar mixture.  Bring to a boil and continue to cook while stirring constantly, until thick.
Pour filling into baked pastry shell.


To make the meringue, whip egg whites in a large glass or metal bowl, until foamy. Add sugar gradually, and continue to whip until stiff peaks form.


Spread meringue over pie, sealing the edges at the crust.


Bake in preheated oven for 10 minutes, or until meringue is golden brown.


Review

Do we really need to review this? I think it's obvious that lemon meringue pie is amazing, and this homemade version is no exception! This pie actually got better the longer it sat in the fridge, which wasn't very long! So with the summer months coming up, try a cool slice of this amazing pie!


Friday, February 28, 2014

Chicken and Bacon Waffles

The Recipe

Courtesy of: Food Network Magazine - March 2014 Issue


For the waffles:
16 slices bacon
4 cups all-purpose flour
2 tbsp baking powder
1 tbsp sugar
Kosher salt
3 large eggs plus 1 egg white
3 cups buttermilk, plus more if needed
1 stick unsalted butter, melted and cooled slightly
Cooking spray

For the chicken:
3 cups peanut or vegetable oil, for frying
2 tsp chopped fresh thyme
1 tsp sweet paprika
1/4 tsp cayenne pepper
2 lb skinless, boneless chicken breasts, cut into 1.5-inch wide strips
Kosher salt and freshly ground black pepper
2 tbsp all-purpose flour
Maple syrup, for serving

Make the waffle batter; Dice 10 bacon slices; cook in a large cast-iron skillet over medium heat, stirring occasionally, until golden brown and crisp, about 8 minutes. Drain on paper towels. Add the remaining 6 bacon slices to the skillet and cook, turning occasionally, until golden brown and crisp, 9 to 11 minutes. Remove the paper towels; reserve the drippings in the skillet.

Combing the flour, backing powder, sugar, and 1/2 tsp salt in a large bowl. Whisk the whole eggs, buttermilk, and melted butter in a separate bowl, then whisk into the flour mixture until smooth. Stir in the cooked dived bacon. Transfer 2 cups of the batter to a separate large bowl for the chicken; reserve the remaining batter for the waffles.

Make the chicken: Preheat the oven to 325 degrees. Add the peanut oil to the skillet with the reserved bacon drippings; heat over medium-high heat until a deep-fry thermometer registers 350 degrees. Add the thyme, paprika, and cayenne to the 2 cups waffle batter; add up to 2 tbsp buttermilk if the batter is too thick. Season the chicken with salt and black pepper, then toss with the flour. Add the chicken to the batter and set aside until ready to fry.

Set a rack on a baking sheet. Working in batches, remove the chicken from the batter, letting the excess drip off, then fry until golden brown, 2 minutes per side; transfer to the rack and reason with salt. Transfer to the oven and bake until no longer pink in the middle, about 8 minutes.

Meanwhile, cook the waffles: spray a waffle iron with cooking spray and preheat. Whisk the egg white in a bowl until soft peaks form; fold into the reserved waffle batter. Ladle 1/2 to 1 cup batter into the waffle iron for each waffle and cook according to the manufacturer's instructions.

Serve with the fried chicken, bacon slices, and top with maple syrup.


Tips/Tweaks

Keeping it Healthy

This recipe has a pretty large (supposedly makes 6 servings) and unhealthy waffle batter. We used our favorite waffle recipe, which can be found here: http://www.foodnetwork.com/recipes/waffle-of-insane-greatness-recipe.html
The "Waffles of Insane Greatness" batter does make less than the above recipe, so we only used 1 cup of the batter for the chicken and only about 1 lb of presliced chicken tenders.

Another thing we did to try and make this recipe a little healthier was to pan fry the chicken instead of deep frying it. We used olive oil and pan fried the chicken until it was crispy, then baked it according to the above recipe.


Review

This was Sarah's first experience of chicken and waffles, something she had wanted to try for a long time. Well, it was a success! We both loved the addition of the bacon, who wouldn't? We were a little skeptical about using the batter to coat the chicken, but it was a very nice way to maintain the sweeter side of waffles with the savoriness of the chicken. Perfect combination!

Wednesday, February 26, 2014

Pasta with Bacon and Leeks

The Recipe

Courtesy of: Food Network Magazine - March 2014 Issue


Kosher salt
12 oz mezzi rigatoni (or other short pasta)
4 slices bacon, cut into 1/2-inch pieces
1 bunch leeks (white and light green parts only), halved lengthwise, thinly sliced, and rinsed well
Freshly ground pepper
3/4 cup heavy cream
1/3 cup grated parmesan cheese, plus more for topping
Chopped fresh parsley, for topping

Bring a large pot of salted water to a boil. Add the pasta and cook as the label directs. Reserve 1 cup of the cooking water; drain the pasta.

Meanwhile, cook the bacon in a large skillet over medium heat, stirring occasionally, until crisp, about 8 minutes. Remove with a slotted spoon and drain on paper towels; pour off all but 1 tbsp of the drippings from the skillet. 

Add the leeks to the drippings in the skillet. Season with 1/2 tsp each salt and pepper and cook, stirring occasionally, until soft, about 3 minutes. Add the heavy cream and cook until it begins to thicken, about 2 minutes.

Add the pasta to the skillet along with the parmesan, half of the backon, and 1/2 tsp pepper; toss to coat, adding enough of the reserved pasta cooking water to loosen. 
To serve, top with the remaining bacon, more parmesan, and parsley.


Tips/Tweaks

Keeping it Healthy

Although the recipe calls for heavy cream, half and half works just as well. We also always use whole grain or whole wheat pasta. The Barilla whole grain pasta tastes just like normal pasta, if you are worried about trying that. And as always with bacon, we use low-sodium bacon.


Review

This recipe was very easy to prepare and therefore, a wonderful weeknight meal idea. The use of heavy cream and bacon drippings is actually not as rich as the recipe makes it sound. We definitely would recommend this recipe.


Hamburger Pie

The Recipe

Courtesy of: Joshua mom, Kris Ericson


1 lb ground beef
1/4 cup chopped onion
12-16 oz frozen green beans
1 can condensed tomato soup
salt and pepper
mashed potatoes
cheddar cheese

Brown meat and onion. Drain. Salt and pepper to taste. Add 1 12-16 oz package frozen green beans. Mix soup with one can of water. Stir into meat mixture. Heat until beans are cooked to desired doneness. While cooking, prepare 4 servings of mashed potatoes (leftovers work well). Mix potatoes a bit dry. Drop spoonfuls onto meat mixture. Garnish with cheddar cheese. Serve promptly.

Tips/Tweaks

Keeping it Healthy

Whenever a recipe calls for ground beef, we always substitute a lean beef/turkey ground mixture (found at Festival Foods). We also use reduced sodium tomato soup.

Tips

If your looking to save some time, use pre-made mashed potatoes, like Bob Evans brand, found in the refrigerated section. You can also brown the meat ahead of time.

Review

We both forgot how good this meal is that when we made it, we made it twice in one week. It makes for great leftovers (or lunch during the week). This has been a recipe that Joshua's mom has made for many years and I'm sure it'll be a go to meal for our family as well.

French Onion Salisbury Steak

The Recipe

Courtesy of: Cuisine at Home Magazine


For the steak:
1.25 lb ground chuck
1/4 cup minced fresh parsley
2 tbsp minced scallions
1 tsp kosher salt
1/2 tsp black pepper
2 tbsp all-purpose flour

For the sauce:
1 tbsp olive oil
2 cups sliced onions
1 tsp sugar
1 tbsp minced garlic
1 tbsp tomato paste
2 cups low-sodium beef broth
1/4 cup dry red wine
3/4 tsp kosher salt
1/2 tsp dried thyme
minced fresh parsley
shredded parmesean

For the cheese toasts:  
4 slices italian baguette, cut diagonally (1/2-inch thick)
2 tbsp unsalted butter, room temperature
1/2 tsp minced garlic
Pinch of paprika
1/4 cup shredded swiss cheese
1 tbsp shredded Parmesan

Combine ground chuck, 1/4 cup parsley, scallions, salt, and pepper. Divide evenly into four portions and shape each into 3/4 to 1-inch thick oval patties. Place 2 tbsp flour in a shallow dish; dredge each patty in flour. Reserve 1 tsp flour. Heat oil in a saute pan over medium-high. Add patties and saute 3 minutes on each side, or until browned. Remove from pan.
Add onions and sugar to pan; saute 5 minutes. Stir in garlic and tomato paste; saute until paste begins to brown, 1 minutes. Sprinkle mixture with reserved flour; cook 1 minute. Stir in broth, wine, salt, and thyme. Return meat to pan; bring sauce to a boil. Reduce heat to medium-low, cover, and simmer 10 minutes.

Meanwhile, prepare the cheese toasts. Preheat oven to 400 degrees. Place bread on a baking sheet. Combine butter, garlic, and paprika; spread on one side of each slice of bread. Combine cheeses and sprinkle evenly over butter. Bake until bread is crisp and cheese is bubbly, 10-15 minutes.

Serve steaks on the cheese toasts with onion sauce ladled over. Garnish with parsley and Parmesan. 

Tips/Tweaks

Keeping it Healthy

Whenever a recipe calls for ground beef, we always substitute a lean beef/turkey ground mixture (found at Festival Foods). We also will use reduced fat cheeses, and did for this recipe. 

Review

We love french onion soup, so this recipe was a playful way of having a hearty meal with the delicious soup. The french onion flavor really cooks into the steaks to enhance the flavor. In the future, we may cube the toasted bread so that it's a little bit easier to eat. This is a very delicious meal and we definitely plan to make it again.

Sunday, January 12, 2014

Tricolor Salad Pizzas

The Recipe

Courtesy of: Food Network Magazine - January/February 2014 Issue


1/3 cup grated parmesan cheese
2 oz part-skim mozzarella cheese
3/4 lb store-bought whole-wheat pizza dough, at room temperature
1 tbsp cornmeal
3 tbsp extra-virgin olive oil
1 cup part-skim ricotta cheese
Freshly ground pepper
1 small head radicchio
2 heads endive
1 cup grape tomatoes
4 cups baby arugula
1 tbsp balsamic vinegar

Preheat the oven to 475 degrees. Spray 2 baking sheets with cooking spray. Finely grate the parmesan and thinly slice the mozzarella. Cut the pizza dough into 4 pieces. Sprinkle a work surface with the cornmeal and use a rolling pin and/or your hands to stretch each piece of dough into a rectangle, about 5 by 11 inches; place 2 rectangles on each baking sheet.


Brush the dough with 1 tbsp of the olive oil, then distribute 4 tablespoon-size dollops of the ricotta onto each rectangle. Scatter with the mozzarella slices, then sprinkle evenly with the grated parmesan and 1/4 tsp pepper. Bake until the cheese is melted and the dough is browned, about 12 minutes.


While the pizzas are cooking, thinly slice the radicchio and endive and halve the tomatoes. Toss in a large bowl with the arugula, the remaining 2 tbsp olive oil and the balsamic vinegar. Top each pizza with about 1.5 cups salad. Serve immediately.


Tips/Tweaks

Keeping it Healthy

Instead of buying fresh mozzarella, we buy Sargento's reduced fat shredded mozzarella. It tastes just as great and is a little more healthy for you. Also, instead of using all olive oil, we use walnut oil.

Slight Changes

Joshua is a sucker for warmed tomatoes, so he preferred to put the tomatoes on the pizza before baking.


Tips

If you are wondering where to find the pizza dough, or what to use, for you local folks - we use Festival brand whole-wheat pizza dough, which you can find in the bakery. This makes the recipe extremely easy to make. Otherwise, making a quick pizza dough is not that difficult either. Just don't use the pop-n-fresh dough.

Review

We made this recipe twice in one week - that's right, TWICE! It is in the Food Network magazine issue about light cooking, so it's wonderful to be able to eat a pizza that is somewhat good for you! This recipe is very simple and extremely delicious, and I'm sure it's now a staple in our typical recipes to refer to.


Red Velvet Puppy Chow

The Recipe 

Courtesy of: www.yourcupofcake.com


5 cup Rice Chex cereal
3/4 cups white chocolate melts or chips
1/4 cups chocolate melts or chips
2 oz cream cheese, room temp
1.5 tbsp milk
1 cup Red Velvet Cake mix
1/2 cup powdered sugar
Valentines colored M&M's or other candies
Heart sprinkles for extra decoration and cute-ness
 
Measure out the Rice Chex cereal and place into a large bowl. Place cake mix and powdered sugar into a large plastic bag or tupperware with a lid.

 
Melt chocolates together in the microwave or on the stove top. Careful not to burn and stir until smooth. 


Stir in cream cheese and milk (the chocolate will get thicker, but it's okay.
 
 
Pour chocolate over Rice Chex cereal and stir until coated. 


Dump cereal into the bag or tupperware with powdered sugar and cake mix. Shake, shake, shake until coated.


Dump onto a cookie sheet and let cool.
 
 
Mix with extra colorful candies and serve! Note that because of the cream cheese, keep in the fridge if you won't be eating them that day. You can also omit the cream cheese all together if you wish...if you do that, you don't need the milk either! 

Review

The Valentine's Day twist on a classic recipe is perfect for a winter snack. It didn't turn out as pink as the picture on the website, but it tastes great! We will be making this in the future for parties or just for us around the holiday!